Modifying a window opening

https://www.youtube.com/watch?v=q8c1wwpeV3E

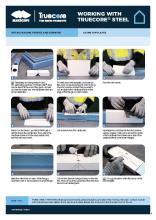
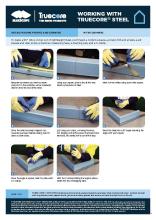
Modifying a window opening can be done efficiently on site. Ensure you follow the manufacturer's directions. If this involves a load-bearing wall, then approval from the manufacturer is required. In this example, we will be moving the window opening. The first step is to mark up a new window location on all relevant components.

The next step is to make the cuts in the noggin. Remove the screws and bend and snap the excess length. Cut the vertical sides of the noggin before the horizontal, being aware that weight bearing can cause the saw to jam.

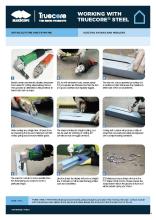
Using tin snips, remove the section and mitre the corners. The cutout section will be used as a template to reproduce the notched noggin. The next step is to remove the remaining fasteners to allow the window frame to be moved into its new position.

Align and then insert the replacement stud. Plum and fix into position.

You will now need to make the replacement noggin. Noggins can be made in a number of ways to fit the connection required. The make a noggin fact sheet provides a step-by-step guide. 

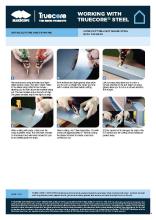
Here, using a pre-notch noggin, the new noggin can be easily cut to size using tin snips.

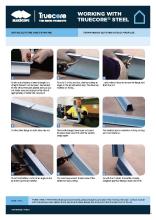
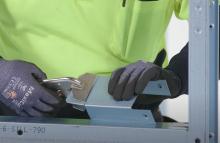
Notch out the return lips. And then using a vice grip, fold up the tab. Insert the new noggin and fasten the outside screws.

Then changing to a 10/16 drill bit, screw fix the back section. The longer drill bit allows a deeper angle and ensures the screw is correctly fixed.
Modifying Door and Window Openings

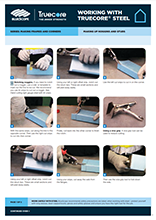
Modifying a window opening, or moving a door, can be done efficiently on-site, however, the frame fabricator’s approval should be given prior to commencing any work.

Once approvals have been given, the modification process is as follows for moving an opening:

  1. Mark up the new location of the window or door.
  2. Adequately temporarily prop up any load-bearing members affected by the modification.
  3. Cut the noggin’s vertical sides first, being aware load transfers can jam the saw.
  4. Remove the noggin screws and bend, snap and remove the excess noggin length. Retain the excess as a template for the noggin needed to extend on the other side of the door/window.
  5. Using tin snips, cut along the remaining noggin’s 90-degree bend to the depth equivalent to the stud depth, allowing the overlap section to be removed.
  6. Trim sharp edges to mitre the corner.
  7. Remove screws of the window/door and move into its new location, plumb to the frames’ final location, and then fasten.
  8. Align, insert and fasten the replacement stud.
  9. The replacement noggin will then need to be made, please refer to the topic Making New Noggins


Note other strengthening work may need to be carried out, particularly for load-bearing walls. Always follow frame fabricators engineered instructions. 

For information on how to make a LGS noggin, see TRUECORE® steel's instructions in the Resources below. Also see our topic and video, Making New Noggins.